
T-shirt fabric seems to be getting thinner and thinner. My eldest has only had this t-shirt a couple of months, and already it has those small holes developing where the fabric rubs on a trouser waistband or belt. Time for some more mending.

I didn’t get to these in time to attempt a proper invisible mend, so I’m left trying to decide how best to make a visible mend acceptable to my eldest child. Flowers and swirls are not quite the thing. Somewhere online – probably on Pinterest – I saw a picture of someone who used a rainbow of embroidered squares to cover the hole in the nape of the neck of a t-shirt around where a brand label is stitched. I can’t find it now – if anyone can let me know, I’ll add a link to it here. I liked this more geometric approach, so decided to give it a go.
I had a few scraps of iron-on interfacing which I ironed on to the inside of the t-shirt. Note that this is the actual “mending” part – this is what stops the holes getting any worse and reinforces the surrounding area. Everything else is just decorative.

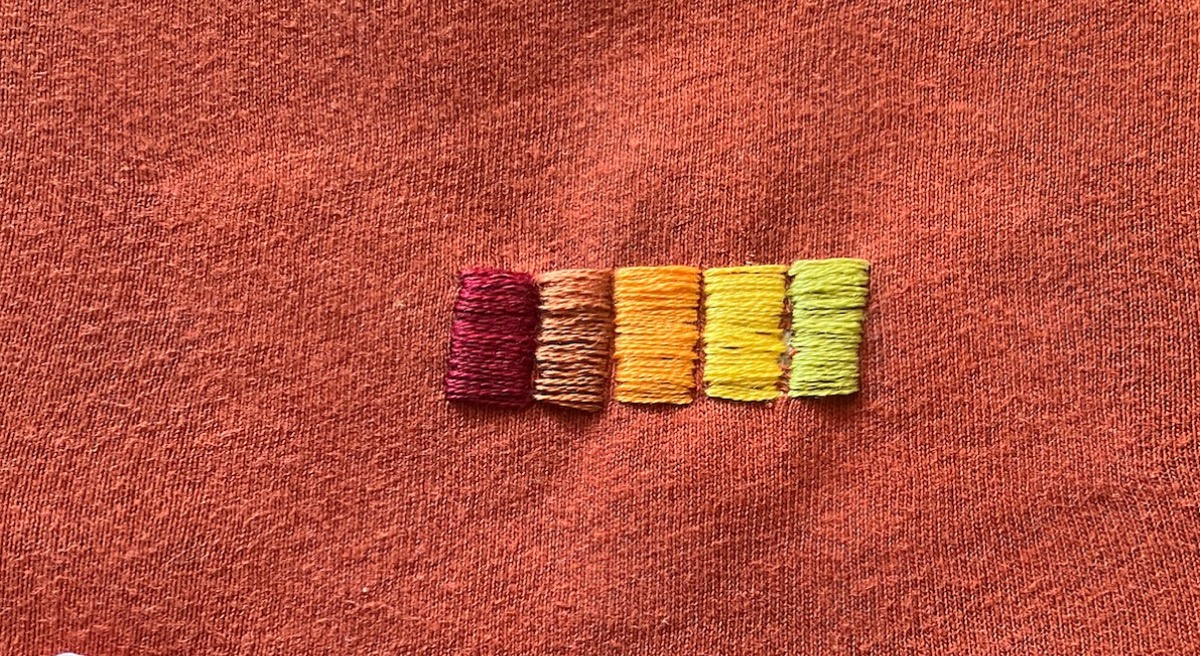
I have a very random stash of embroidery cotton, decades old, but I liked the way these five colours worked with the colour of the t-shirt.

I can only find this one of my embroidery hoops, but it was thankfully about the right size.

I faintly sketched some small rectangles that would cover the main area of holes using a pencil and then just went for it with a simple satin stitch. I used the weave of the fabric to keep my rectangles straight – which is why overall the block is on a slight tilt compared to the hem of the t-shirt. (The way cheaper t-shirt fabric is made on a circular loom means the grain of the fabric doesn’t not run straight up and down the garment.)


The least said about the back, the better. It’s secure, that’s all that matters…

There were a few more of those pesky little holes dotted around, so I gave them the treatment individually.

And I can report that my eldest is happily wearing this t-shirt again now, so it can’t be too embarrassing.
See my post about Visible Mending of Woollen Jumpers and all my mending and upclycling posts here.
I also have a Pinterest board where I collect useful ideas about mending and up cycling, you can find it here:
I love this! Even I can make a square! Before I begin my own project, I am curious about the shape and size of the iron on patch. I would want it to be a little smaller for flowy-ness of the shirt. But then maybe it would have to be an unusual shape (I’d cut off the corner where there aren’t holes to be covered.) Do you not recommend this for any reason? Thank you
Hi Jessica! My main consideration in this case was to reinforce the whole area since the t-shirt was so thin there I could tell new holes would soon form, so I used the largest convenient scraps of iron-on interfacing I had. If I were mending something important or delicate, that would be handled delicately, I wouldn’t use the interfacing at all because – as you say – it affects the drape of the fabric. If you want to go for something in-between, then certainly you could cut your interfacing much closer to the size of the damaged area, and rounded edges would be less noticeable on the right side.