
While our yoghurt-maker is busy year round making our default desserts, there are a couple of savoury recipes I also make, including this ‘cream cheese’ which is perfect on bread or crackers, or as a dip.
Now I know this isn’t actually cream/curd/soft cheese so please don’t tell me. This is just our very easy family recipe for a thick, savoury, creamy spread, that replaces cream cheese for us on the table. (I’ve never tried it in recipes calling for cream cheese, I make cream cheese for that, but that’s a whole different blog.)
I was making this just as a handy thing for us to eat, before I knew that it might be something called labneh or labaneh. We don’t call it that at home, we just call it ‘cream cheese’ since that’s the job it does for us interchangeably with actual cream cheese. I’m adding the word labneh as I believe that is what it’s called in some parts of the world, but I don’t make any claims to authenticity.
This super-easy recipe just takes a couple more steps than making ordinary yoghurt. For general points about yoghurt-making, please see my homemade natural yoghurt recipe.
While it takes quite a long time to be ready from start to finish, it’s not *your* time. The actual work you do only takes a few minutes.
One of the great things about this recipe is that it makes a large enough quantity to last for several family meals, or to flavour some of it differently to create options.
Yoghurt Cream Cheese Recipe
Jump to the brief, printable recipeDay One (Evening)
Empty your starter yoghurt into a large bowl or jug. 120-150g of natural yoghurt is enough to culture this recipe. Add 1 litre of whole UHT milk to the yoghurt, starting with just a little, and stir really well.
I believe labneh is traditionally made with goat’s milk, although I’ve never tried that. You would need a goat’s milk yoghurt starter, and UHT goat’s milk.

Remember you can’t use fresh milk to make yoghurt like this, it must be UHT. For all my tips on the basics of yoghurt-making, please see my core natural yoghurt recipe.
At this stage, you can ladle out one pot of the yoghurt mixture, to use as a starter for a future batch of yoghurts if you wish to.

Pour the remaining yoghurt mixture into a 1-litre tub that is suitable for your yoghurt maker. If you have one, this should have the strainer fitted.

Place the yoghurt in your yoghurt maker, following the manufacturer’s instructions (I’m making double quantities in the following picture).

Set the fermentation time for 12 hours.
If you don’t mind fiddling about with the straining in the evening, you can swap the times of day around, and perform the fermentation during the day, and the straining overnight.
Day Two (Morning) – Straining
At the end of the fermentation time, cool the yogurt on the kitchen side for half an hour or so.
You can now cover and refrigerate the starter yoghurt, if you made one.
If your tub containing the bulk of the mixture is fitted with a strainer, you now set it in the straining position (shown on the left below).

If you don’t have a purpose-built strainer, then place a sieve over a bowl, line it with cheesecloth and gently spoon your yoghurt into that.
Cover, refrigerate and leave to drain for 1-2 hours.
Transfer the yoghurt to a bowl, add salt to taste (start with a good teaspoon and go from there) and stir gently but thoroughly.
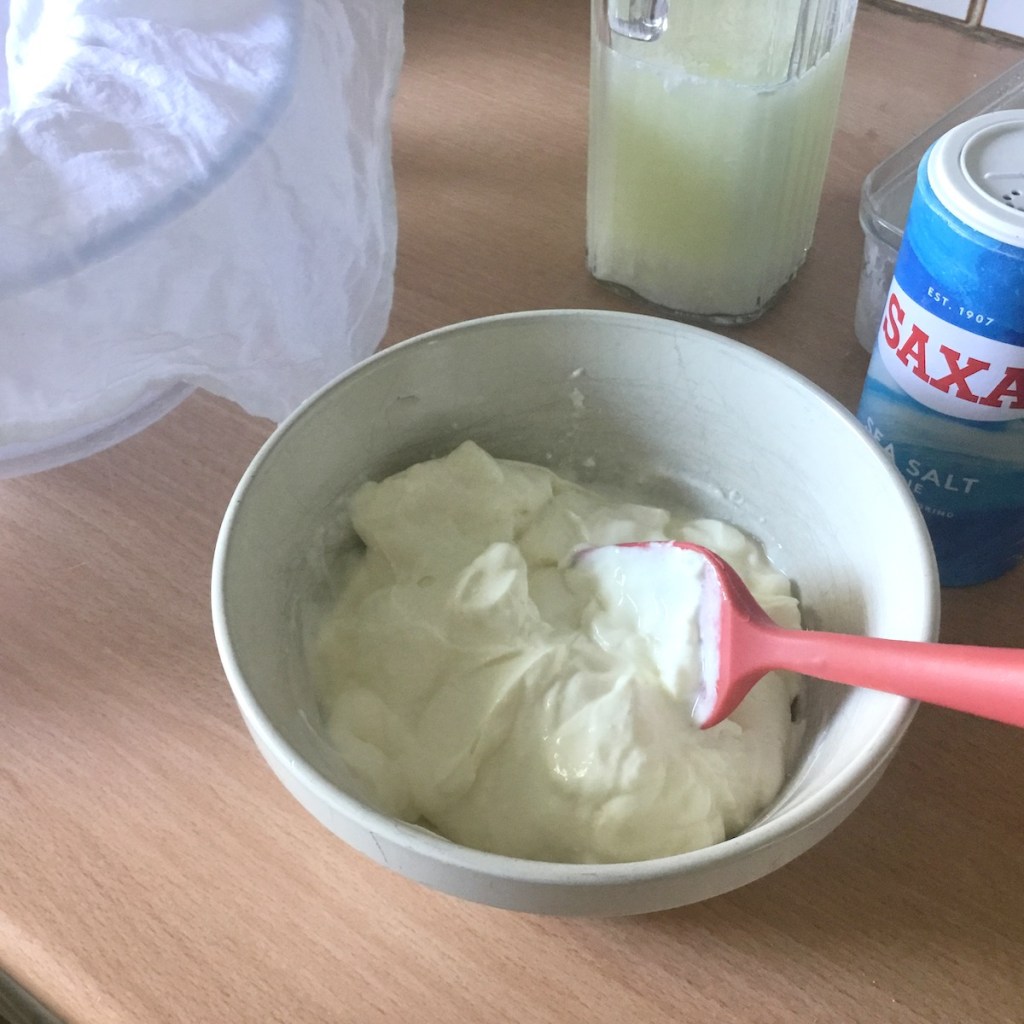
Now place a sieve over a large bowl, line the sieve with cheesecloth, and spoon the yoghurt into this.

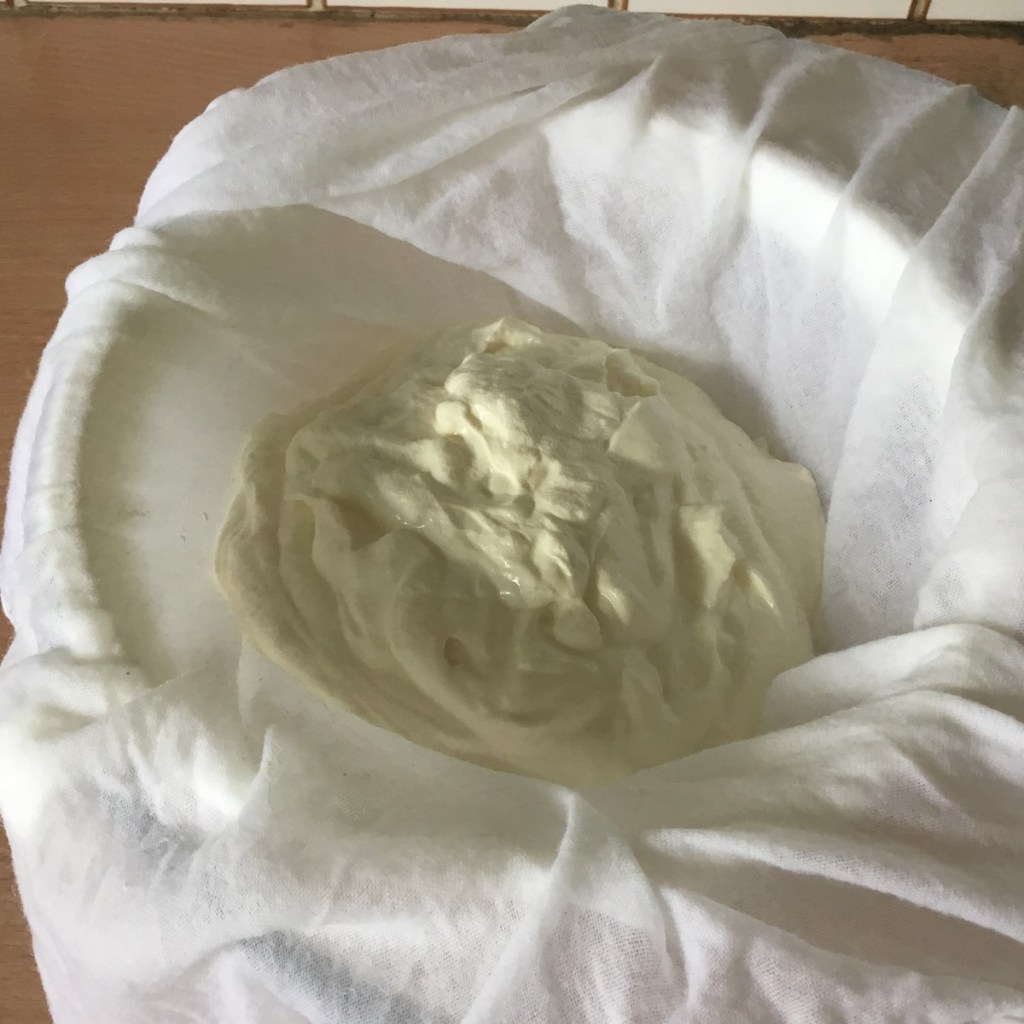
Cover the sieve with a plate or saucepan lid and refrigerate.
Note that the whole of the cheesecloth is going to end up wet and will likely drip if you leave it dangling, so lift the corners of the cloth up on to the plate/lid covering the sieve. Or you could place the whole contraption on a large tray to catch any drips.
There is no fixed time for straining your yoghurt cream cheese. Much will depend on how thick/set your yoghurt was to start with, and how thick you want the resulting cream ‘cheese’ to be. It will be a bit longer than if you were making ‘Greek’ yoghurt (although we tend to eat our Greek yoghurt very thick as I usually strain that overnight). 10-12 hours is a guide. As mentioned above, the straining can be done overnight if that works better with your schedule.
Day Two (Evening)
By the evening, your yoghurt cream cheese will be denser and look drier and you will find a surprising amount of whey has drained into the bowl below.
You can taste it again at this stage and see if you think it needs more salt.
Transfer the finished yoghurt cream cheese to a tupperware-type sealable box, old ice-cream tub or similar for storage.
Transfer the whey to a jug or other container if you plan to use it. Note that since this whey contains salt, it cannot be used to start another batch of yoghurts. However, if it is not too salty, you may be able to use it in other recipes (adjusting any other salt in the recipe accordingly). For example, I have used it in making cheese scones and cheese pastry. See my post on what to do with leftover whey.
Freshly-made tangy cheese scones with this cream cheese spread on them are absolutely delicious, and if you use the whey to make the scones it creates a wonderful sort of symbiotic meal!
In storage, the yoghurt cream cheese will continue to drain itself, meaning small amounts of whey will appear in your storage pot, but this is not a problem. Just pour it away or don’t.
Serving
When it comes to eating your yoghurt cream cheese, you can just serve it as is, or you can take some of it out and add different flavourings.
I often add black pepper and/or dried herbs as a quick change in flavour. Chopped chives are delicious in this yoghurt cream cheese, as is minced garlic – be guided by your own taste. Most often, I keep half of it plain, and turn the other half into garlic-and-chive dip/spread.
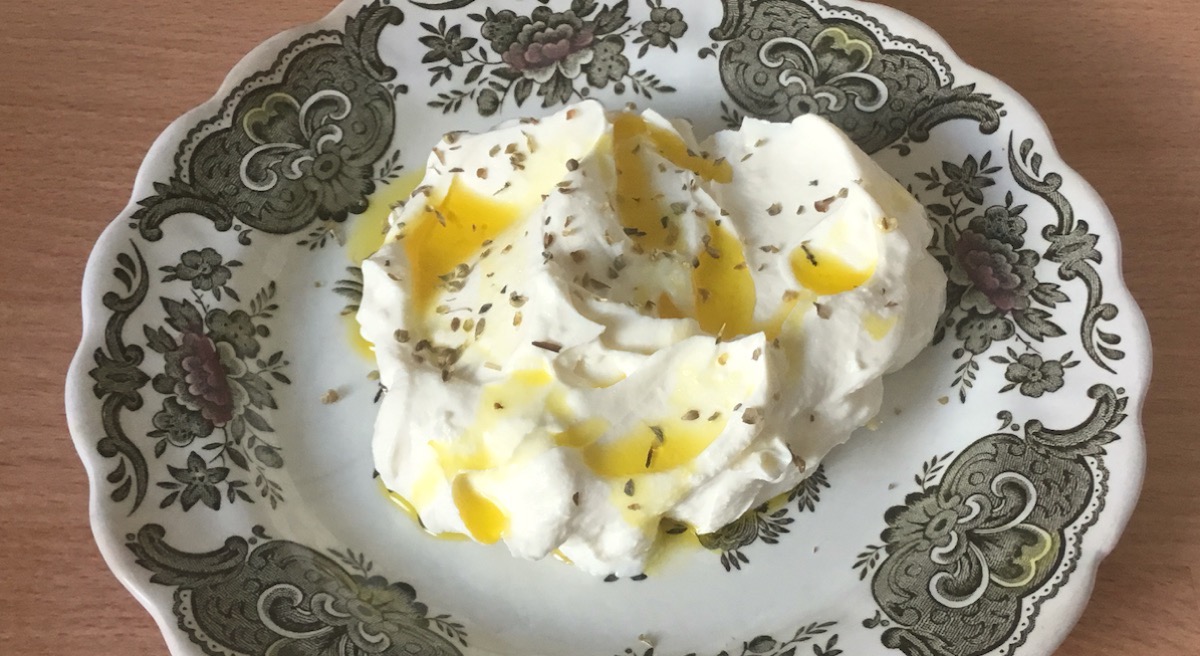
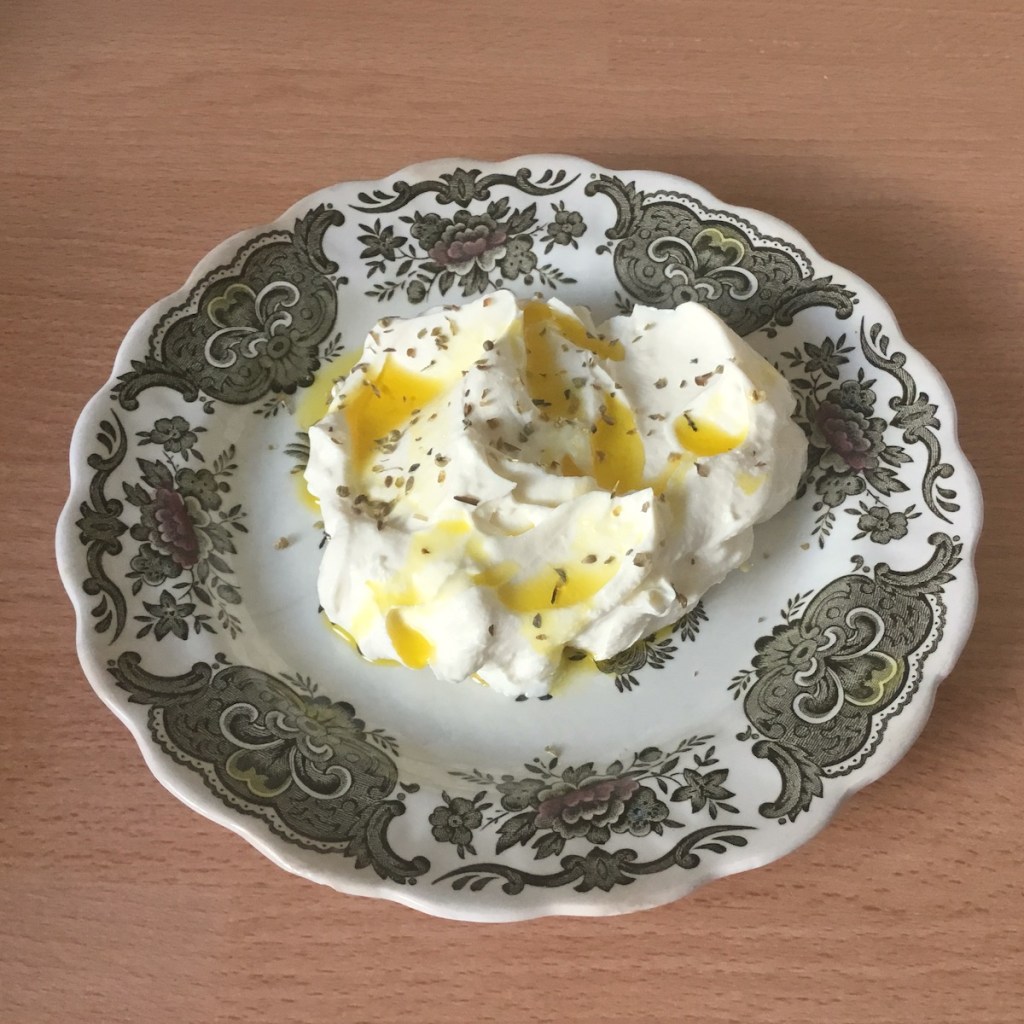
Since learning about labneh, I have also served it on a plate, drizzled with olive oil and herbes de Provence or oregano, which gives it another different aspect.
In due course, I hope to get around to posting my actual cream cheese/fromage blanc recipe, but the above recipe serves us very well for most savoury non-cooking purposes. It also moves your starter along. I have more yoghurt variations yet to post before I start on fromages blancs!
If you enjoy this recipe and found it useful, please consider donating a small amount towards the running of my website using the “Support me” button.
Find all my homemade yoghurt-related recipes on my Yoghurt Recipe Roundup Page.
Yoghurt Cream Cheese Printable Recipe

Yoghurt Cream Cheese
Equipment
- yoghurt maker
- yoghurt-making tub with strainer and/or
- sieve and cheesecloth
Ingredients
- 120-150 g full-fat natural yoghurt
- 1 litre whole UHT milk see Notes
- salt
Instructions
Day One (Evening)
- Empty your starter yoghurt into a large bowl or jug.
- Add the milk to the yoghurt, starting with just a little, and stir really well.
- Ladle out one pot of the plain yoghurt mixture, which will be a starter for a future batch of yoghurts. (optional)
- Ladle or pour the remaining yoghurt mixture into a 1-litre tub (if possible fitted with a strainer) that is suitable for your yoghurt maker.
- Place the yoghurt in your yoghurt maker, following the manufacturer’s instructions.
- Set the fermentation time for 12 hours
Day Two (Morning)
- At the end of the fermentation time, cool the yoghurt on the kitchen side for half an hour.
- Cover and refrigerate the natural starter yoghurt, if you made one.
- Strain the remaining yoghurt for 1-2 hours by setting your tub in the straining position or by gently spooning the yoghurt into a cheesecloth-lined sieve standing over a bowl.
- Transfer the thickened yoghurt to a bowl and gently but thoroughly stir in salt according to taste.
- Spoon the mixture into a cheesecloth-lined sieve over a bowl.
- Cover and refrigerate for 12 hours or longer if you prefer.
Day Two (Evening)
- Transfer the yoghurt cream cheese to a storage container.
- Cover and refrigerate until serving.
To Serve
- Serve as it is or drizzled with olive oil with crackers or crudités. Alternatively, add flavourings to all or part of it such as black pepper, chopped chives, other dried herbs, minced garlic, olive oil, etc.
Notes
If you make this yoghurt cream cheese I’d love to hear from you in the comments below!
Click here to see all my family recipes.